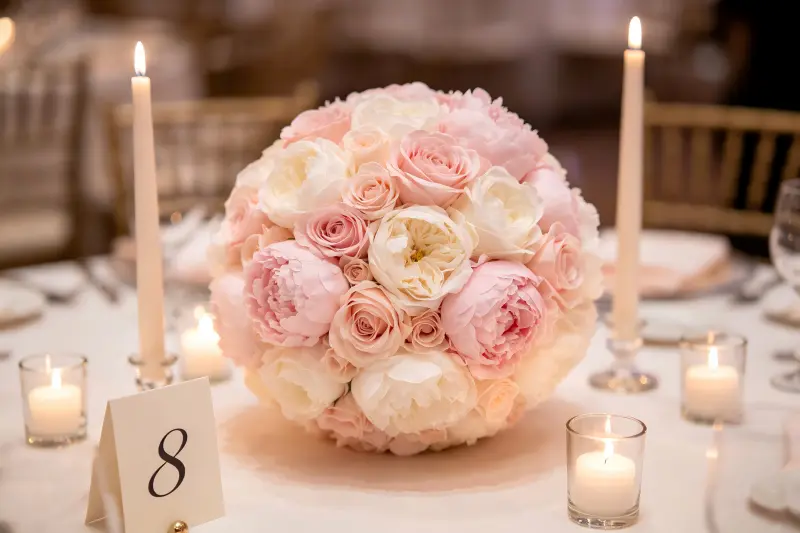
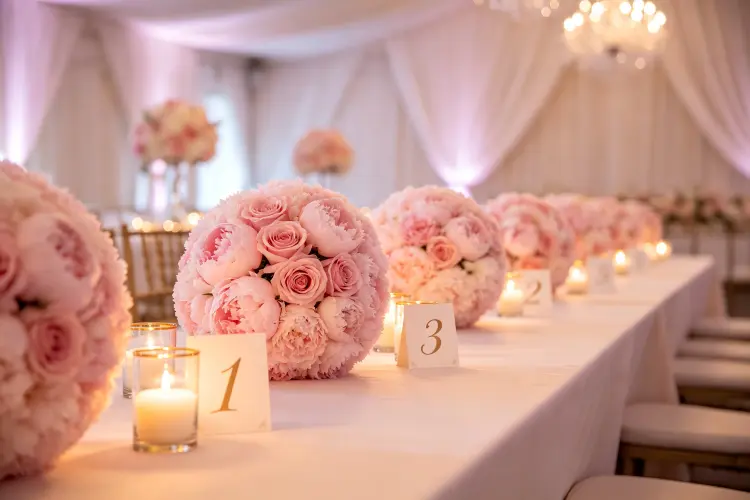
Flower ball centerpieces are one of the most versatile and eye-catching decor items for weddings, parties, and corporate events. They're compact, elegant, and instantly elevate any table setting.
But buying pre-made flower balls can get expensive — especially if you need 15-20 for a wedding. The good news? Making your own is surprisingly easy, costs a fraction of the price, and lets you customize every detail to match your event colors and theme.
In this complete tutorial, we'll walk you through everything you need to know — from materials and tools to step-by-step instructions, style variations, and bulk production tips. Even if you've never done a DIY project before, you can make professional-looking flower ball centerpieces in about 30 minutes each.
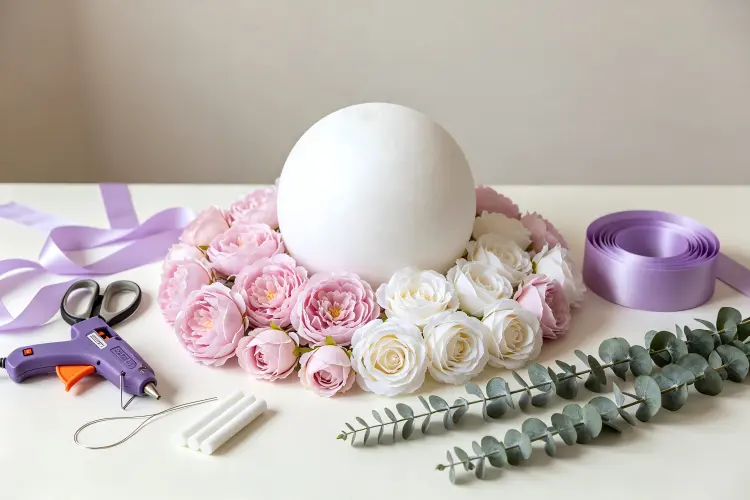
Materials & Tools You'll Need
For One 8-Inch Flower Ball
Pro tip: If you're making multiple balls, buy flowers in bulk. Online suppliers offer much better prices than craft stores. For 20 flower balls, you'll need approximately 1,200-1,600 flower heads total.
Prep Work
Before you start gluing, do these prep steps to make the process smoother:
- Prep all flowers first: Remove all flower heads from stems. Cut stems to about 1/4 inch (just enough to insert into foam). Sort flowers by size and color.
- Plan your color layout: If using multiple colors, lay out the pattern before gluing. A common approach: start with larger flowers as anchors, fill in with medium flowers, finish with small flowers and greenery.
- Protect your work surface: Hot glue can damage tables. Use a silicone mat, parchment paper, or old newspaper.
- Have a way to hold the ball: A bowl or ring (like a bundt pan) holds the ball steady while you work. You'll rotate it as you go.
- Work in a well-ventilated area: Hot glue fumes can be strong. Open a window or work near a fan.
Step-by-Step Tutorial
Mark Your Starting Point
Use a pencil to lightly mark a small circle on the foam ball — this is where you'll start. If the ball will sit on a table, leave a 2-inch flat spot at the bottom (you can gently press it on a table to create a flat base). If it will hang, leave a small area at the top for the ribbon.
Glue the Largest Flowers First
Start with your largest flower heads (peonies, large roses). Apply a small dot of hot glue to the base of each flower stem, then press it firmly into the foam ball. Hold for 3-5 seconds until the glue sets.
Place 5-7 large flowers evenly around the ball, like a pattern. These are your "anchor" flowers — they establish the overall shape and coverage. Space them about 2-3 inches apart.
Important: Don't use too much glue. A small dot is enough. Excess glue will show through gaps and look messy.
Fill In with Medium Flowers
Next, take your medium-sized flowers (standard roses, carnations) and fill the gaps between the large anchor flowers. Work systematically around the ball, rotating it as you go.
Place medium flowers about 1-2 inches apart, angling them to follow the curve of the ball. The goal is even coverage with no large bare spots showing.
Keep checking from all angles — it's easy to miss a spot when you're focused on one area.
Add Small Flowers & Buds
Now use small flowers, buds, and berry sprigs to fill in the remaining gaps. These smaller elements add texture and make the ball look full and professional.
Pay special attention to the areas where large flowers meet — these are the most common spots for bare foam to show through. Tuck small flowers into these crevices.
Add Greenery (Optional but Recommended)
Tuck small greenery sprigs (eucalyptus leaves, ivy, fern fronds) between flowers to add depth and a natural look. Greenery breaks up the "all flower" look and makes the ball appear more organic.
Focus greenery around the base and in gaps between flower clusters. Don't overdo it — the flowers should still be the star.
Inspect & Touch Up
Hold the ball up and rotate it slowly, checking from every angle. Look for:
- Bare foam spots showing through
- Loose flowers that need more glue
- Uneven coverage (one side denser than the other)
- Glue strings or excess glue visible
Fix any issues by adding more flowers or pressing loose ones back in. Remove visible glue strings with a toothpick or your fingers (be careful — glue may still be warm).
Add Hanging Ribbon or Base (Optional)
For hanging: Glue a loop of ribbon to the top of the ball. Reinforce with a small piece of felt or fabric between the ribbon and foam for extra hold.
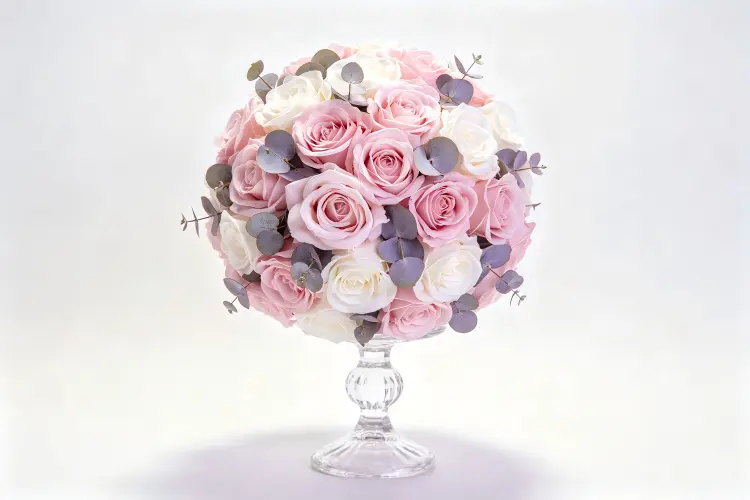
For table centerpiece: If you left a flat bottom, the ball can sit directly on the table. For extra elegance, place it on a candlestick, glass pedestal, or mirror tray.
For aisle markers: Add a longer ribbon to hang from chairs or hooks.
Let Cure & Store
Let the finished flower ball sit for at least 1 hour before moving or using it. This gives the glue time to fully cure.
Store in a cool, dry place. For long-term storage, wrap in tissue paper and place in a box. Avoid stacking heavy items on top — flowers can get crushed.
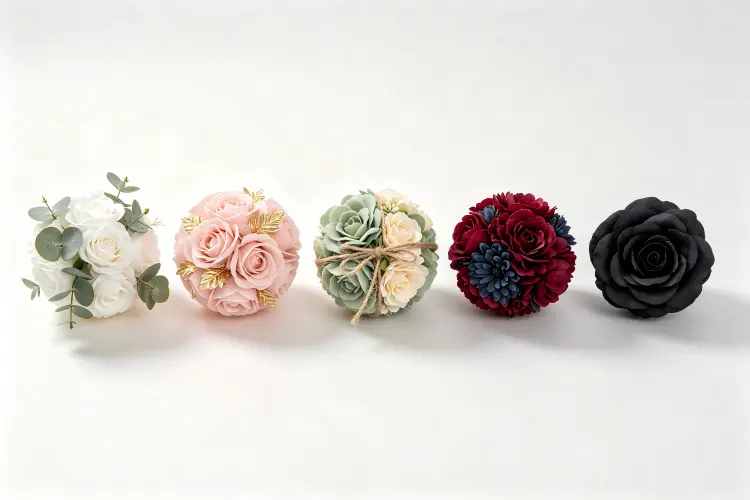
5 Style Variations
1. Classic All-White
The most popular and versatile style. Mix white roses, peonies, and hydrangeas with eucalyptus greenery. Perfect for traditional weddings, formal events, and any setting where you want an elegant, timeless look. Matches any color scheme.
2. Blush Pink & Gold
Romantic and feminine. Mix blush pink roses with white peonies and add a few gold-sprayed leaves or berry sprigs for glamour. Great for garden weddings, bridal showers, and Valentine's Day events.
3. Boho Sage & Cream
Natural and organic. Use cream and ivory flowers mixed with lots of eucalyptus, olive branches, and dried-looking greenery. Add twine instead of ribbon. Perfect for boho, rustic, or outdoor weddings.
4. Bold Burgundy & Navy
Rich and dramatic. Mix burgundy peonies, navy blue thistle, and deep red roses with gold accents. Ideal for fall weddings, holiday parties, and formal galas. Makes a strong visual statement.
5. Monochrome Single Flower Type
Modern and clean. Use just one flower type (e.g., all roses or all hydrangeas) in a single color. The uniformity creates a sleek, contemporary look. Great for corporate events, minimalist weddings, and modern parties.
Bulk Production Tips for Events
Making 15-20 Flower Balls Efficiently
If you're making flower balls for a wedding or large event, use these batch production strategies to save time:
- Assembly line method: Do Step 1 (mark balls) for all balls, then Step 2 (large flowers) for all, then Step 3 (medium flowers) for all. This is faster than completing one ball at a time because you stay in the same mindset and don't switch tools.
- Prep all flowers first: Spend 30-45 minutes removing all flower heads from stems and sorting by size/color before you start gluing. This makes the gluing process much faster.
- Work in 2-hour sessions: Hot glue work is tiring on the hands. Take breaks every 1-2 hours. You'll make fewer mistakes when you're fresh.
- Recruit help: This is a great project for a bridesmaid get-together or craft party. Put on music, pour wine, and make it fun. Two people can make 20 balls in about 6-8 hours total.
- Make 2-3 extra: Always make a few extra balls. You might damage one during setup, or decide you want more coverage. Extras can be used elsewhere (welcome table, gift table, bathroom).
- Start 2-3 weeks early: Don't leave this to the night before the event. Start 2-3 weeks ahead so you have time to fix mistakes and not feel rushed.
Cost Comparison: DIY vs Buy vs Fresh Flowers
Cost Per 8-Inch Flower Ball Centerpiece
For a 20-table wedding:
- DIY: $160-300 total
- Pre-made retail: $500-1,200 total
- Wholesale commercial: $240-500 total
- Fresh flowers: $800-2,000+ total
DIY saves 50-70% vs retail pre-made, and 75-85% vs fresh flowers. The trade-off is your time — plan for 30-45 minutes per ball.
For rental businesses: If you're making these for your rental inventory, consider buying commercial-grade pre-made flower balls instead. They're more durable (plastic cage core vs foam), consistent quality, and your time is better spent on marketing and operations. Wholesale pricing is close to DIY material cost.
FAQ
Plan for 30-45 minutes per 8-inch ball for your first few. Once you get the hang of it, you can do one in 20-30 minutes. Larger balls (10-12 inches) take 45-60 minutes because they need more flowers.
Approximately 60-80 flower heads for full coverage. This varies based on flower size — large peonies cover more area (need fewer), while small roses need more. Always buy 20% extra to account for mistakes and gaps.
Yes, but fresh flowers need water and will only last 1-3 days. You'll need to use a wet foam (floral foam) ball soaked in water, and make the balls the day before the event. Artificial flowers are reusable, don't need water, and can be made weeks in advance — which is why most people choose artificial for events.
The key is using enough glue and pressing firmly. Use high-temperature hot glue (not low-temp). Apply glue to both the stem and the foam surface for extra hold. Let each flower set for 3-5 seconds before moving on. For heavy flowers, you can insert a floral pin through the base for extra security.
Yes! Artificial flower balls can be reused many times if handled carefully. Store them in boxes with tissue paper, don't stack heavy items on top, and touch up any loose flowers before each use. With proper care, DIY flower balls can last for multiple events. Commercial-grade balls with plastic cage cores last even longer (50-100+ uses).
8-inch is the most popular size for table centerpieces — it's large enough to make a statement but doesn't block conversation across the table. 6-inch works well for smaller tables or when paired with other decor. 10-12 inch balls are better for entrance tables, welcome areas, or as statement pieces.
Want Professional-Grade Flower Balls Without the DIY Work?
At Xibo Floral, we manufacture commercial-grade artificial flower balls with durable plastic cage cores — built to last 50-100+ rentals. Available in 4" to 20" sizes, 15+ color combinations, and fully customizable. Perfect for rental businesses and high-volume events. Wholesale pricing starts at $8-18 per ball.
Get Wholesale Pricing & Free Samples